The Best Fluffy Pancakes recipe you will fall in love with. Full of tips and tricks to help you make the best pancakes.
The Ultimate No-Bake Strawberry Crunch Cheesecake Recipe
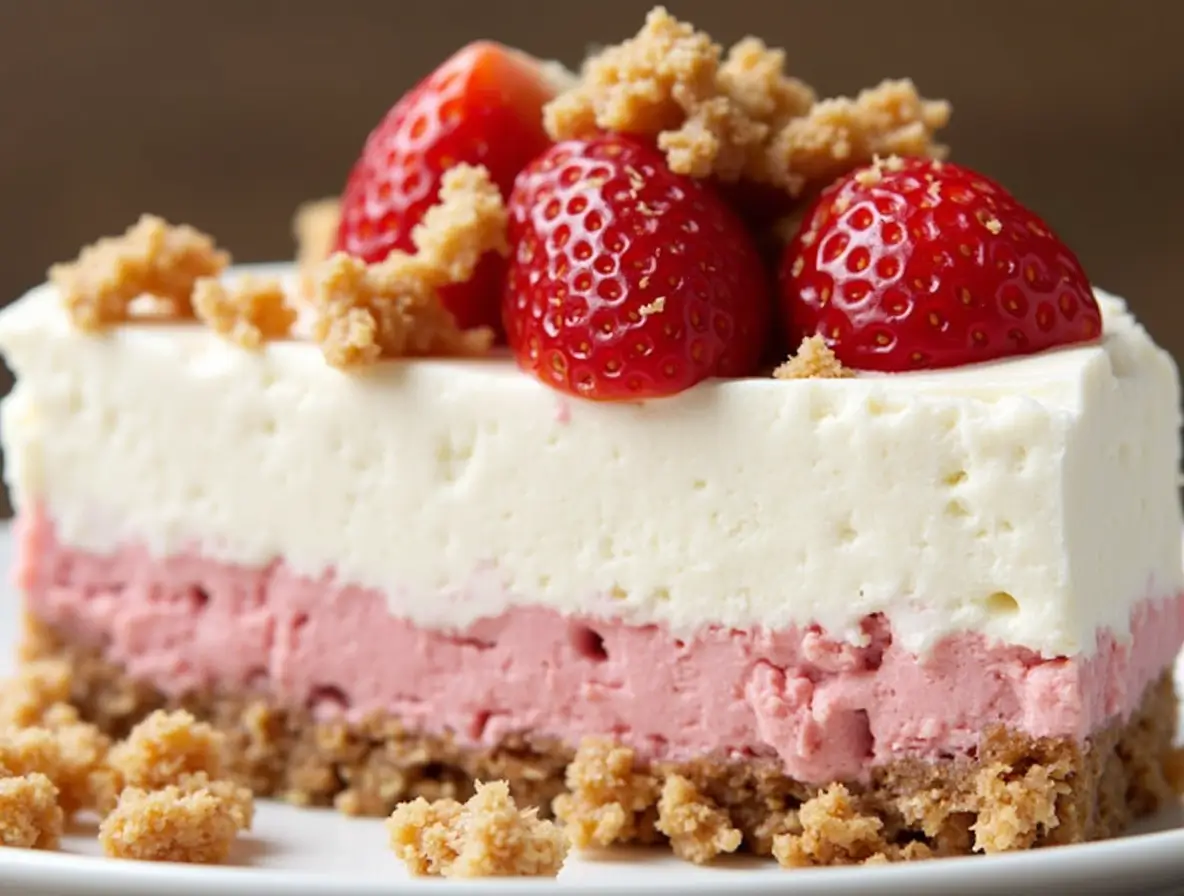
Craving a show-stopping dessert that requires no baking? This No-Bake Strawberry Crunch Cheesecake combines creamy cheesecake, fresh strawberry flavor, and an irresistible crunchy topping. Perfect for summer gatherings or any special occasion!
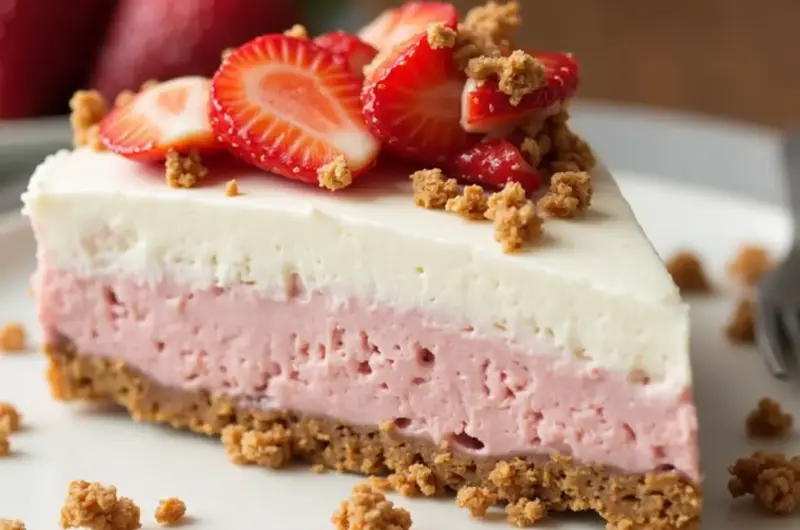
There’s something magical about a dessert that can wow your guests without ever touching the oven. This No-Bake Strawberry Crunch Cheesecake does exactly that – delivering layers of buttery graham cracker crust, velvety strawberry-swirled cheesecake, and a uniquely satisfying golden cookie crunch topping that’ll have everyone asking for seconds.
Why This Recipe Works
What makes this no-bake strawberry cheesecake truly special is its perfect balance of textures and flavors. The smooth, creamy filling gets a fruity twist from real strawberry jam, while the signature crunch topping adds an addictive texture contrast that sets it apart from traditional cheesecakes. Best of all, it’s practically foolproof – if you can stir and refrigerate, you can make this dessert!
Key Ingredients You’ll Need
For the Graham Cracker Crust
The foundation of our cheesecake starts with a classic graham cracker crust that’s buttery and perfectly sweetened. Using high-quality graham crackers makes a noticeable difference in the final taste.
For the Cheesecake Filling
The star of the show is our luxuriously smooth filling, made with:
- Room temperature cream cheese (this is crucial for achieving that silky texture)
- Light and airy whipped topping
- Just the right amount of powdered sugar
- Pure vanilla extract for depth
- Strawberry jam or jelly for that fresh berry flavor
For the Signature Crunch Topping
The crowning glory of this cheesecake is its unique crunch topping, featuring:
- Golden Oreos (or regular Oreos if you prefer)
- Strawberry Jell-O powder for color and flavor
- Melted butter to bind it all together
Step-by-Step Instructions
1. Creating the Perfect Crust
Let’s start with the foundation of our cheesecake. In a medium bowl, combine your graham cracker crumbs with sugar and melted butter until it resembles wet sand. Press this mixture firmly into your springform pan, making sure to create an even layer. The back of a measuring cup works perfectly for this! Pop it in the fridge while you work on the filling.
2. Whipping Up the Filling
Here’s where the magic happens. Beat your softened cream cheese until it’s light and fluffy – no lumps allowed! Gradually add in the powdered sugar and vanilla extract, continuing to beat until smooth. Gently fold in your whipped topping, being careful not to deflate it. This is what gives our cheesecake its heavenly texture. Finally, swirl in the strawberry jam to create beautiful strawberry ribbons throughout.
3. Assembly and Chilling
Spread your filling over the chilled crust, smoothing the top with a spatula. This is the time to get artistic – create pretty swirls on top if you’d like! Cover and refrigerate for at least 4 hours, though overnight is even better.
4. Creating the Crunch Topping
While your cheesecake sets, prepare the iconic crunch topping. Mix together crushed Golden Oreos, strawberry Jell-O powder, and melted butter until well combined. This mixture should be crumbly and vibrant pink. Just before serving, sprinkle this generously over your set cheesecake.
Pro Tips for Success
- Ensure all dairy ingredients are at room temperature before starting
- Don’t rush the chilling process – patience makes perfect cheesecake
- For clean slices, dip your knife in hot water and wipe dry between cuts
- Store any leftovers covered in the refrigerator for up to 3 days
Make It Your Own
Feel free to customize this recipe to your taste:
- Swap strawberry for raspberry jam and Jell-O for a different berry variation
- Try chocolate Oreos in the topping for a chocolate-covered strawberry vibe
- Add fresh strawberry slices as garnish just before serving
Storage and Make-Ahead Tips
This cheesecake is perfect for making ahead! It keeps beautifully in the refrigerator for up to 3 days, or you can freeze it for up to 2 months. Just add the crunch topping right before serving to maintain maximum crunchiness.
No-Bake Strawberry Crunch Cheesecake
Course: DessertCuisine: AmericanDifficulty: AmericanServings
12
servingsPrep time
20
minutesCooking time
4
hoursCalories
320
kcalIngredients
- For the Crust:
2 cups graham cracker crumbs
1/4 cup granulated sugar
1/2 cup unsalted butter, melted
- For the Filling:
16 oz cream cheese, softened to room temperature
1 cup powdered sugar
1 teaspoon vanilla extract
8 oz whipped topping
1/2 cup strawberry jam or jelly
- For the Crunch Topping:
1 1/2 cups Golden Oreos, crushed
1 (3 oz) package strawberry Jell-O powder
1/4 cup unsalted butter, melted
Directions
- Prepare the Crust:
- Mix graham cracker crumbs, sugar, and melted butter in a bowl
- Press mixture firmly into the bottom of a 9-inch springform pan
- Refrigerate while preparing filling
- Make the Filling:
- Beat cream cheese until smooth and creamy
- Add powdered sugar and vanilla extract, beat until well combined
- Fold in whipped topping gently
- Swirl in strawberry jam
- Spread over chilled crust
- Chill:
- Refrigerate for minimum 4 hours or overnight
- Prepare Topping:
- Combine crushed Golden Oreos, Jell-O powder, and melted butter
- Mix until evenly coated
- Sprinkle over set cheesecake just before serving
Notes
- For best results, ensure cream cheese is completely softened
- Store in refrigerator for up to 3 days
- Can be frozen for up to 2 months (add topping after thawing)
- Double wrap in plastic wrap and foil for freezing
- Let frozen cheesecake thaw overnight in refrigerator
- S
- v
I hope you enjoy making this No-Bake Strawberry Crunch Cheesecake! If you try this recipe, we’d love to hear how it turned out. Share your photos and experience in the comments below, or tag us on social media with #StrawberryCrunchCheesecake. Happy baking (or should I say, no-baking)! 😊
Need help or have questions? Drop them in the comments section below, and I’ll be happy to assist you!