The Best Fluffy Pancakes recipe you will fall in love with. Full of tips and tricks to help you make the best pancakes.
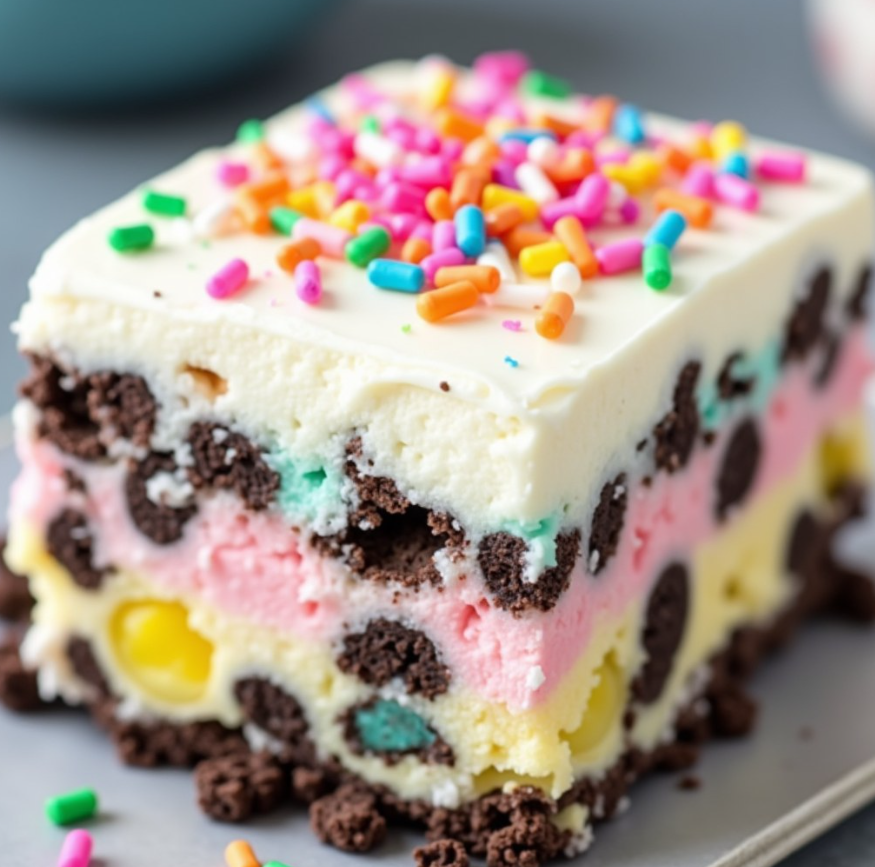
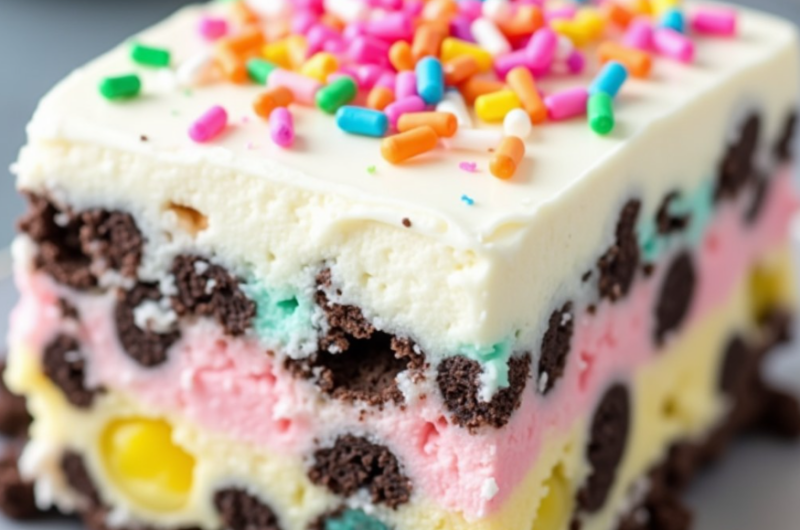
No-Bake Funfetti Oreo Icebox Cake: A Colorful, Creamy Delight
Why You’ll Love This Funfetti Oreo Icebox Cake
This Funfetti Oreo Icebox Cake combines two beloved dessert flavors – the chocolatey goodness of Oreos and the festive fun of rainbow sprinkles – into one no-bake treat that’s perfect for birthdays, parties, or any celebration. With layers of creamy cheesecake filling studded with colorful sprinkles and Oreo pieces, all sitting atop a chocolate cookie crust, this dessert is both easy to make and impressive to serve.
The best part? This showstopper dessert requires no baking – just mix, layer, and chill! It’s the perfect make-ahead dessert that actually improves with time in the refrigerator, allowing all the flavors to meld together into creamy perfection.
Ingredients You’ll Need
For the Oreo Crust:
- 24 Oreo cookies, finely crushed (about 2 cups of crumbs)
- 4 tablespoons unsalted butter, melted
For the Funfetti Cream Cheese Filling:
- 2 cups heavy whipping cream, cold
- ½ cup powdered sugar
- 1 teaspoon vanilla extract
- 1½ cups (12 oz) cream cheese, softened to room temperature
- ½ cup granulated sugar
- 1 cup rainbow sprinkles (jimmies work best)
- ½ cup crushed Oreo cookies (about 6-7 cookies)
For the Garnish:
- Extra whipped cream (homemade or from a can)
- Additional rainbow sprinkles
- Mini Oreo cookies for decoration
No-Bake Funfetti Oreo Icebox Cake
9
servings15
minutes380
kcalIngredients
- or the Oreo Crust:
24 Oreo cookies, finely crushed (about 2 cups of crumbs)
4 tablespoons unsalted butter, melted
- For the Funfetti Cream Cheese Filling:
2 cups heavy whipping cream, cold
½ cup powdered sugar
1 teaspoon vanilla extract
1½ cups (12 oz) cream cheese, softened to room temperature
½ cup granulated sugar
1 cup rainbow sprinkles (jimmies work best)
½ cup crushed Oreo cookies (about 6-7 cookies)
- For the Garnish:
Extra whipped cream (homemade or from a can)
Additional rainbow sprinkles
Mini Oreo cookies for decoration
Directions
- Preparing the Crust
- Line an 8×8-inch baking dish with parchment paper, leaving overhang on the sides for easy removal.
- In a medium bowl, combine the crushed Oreo cookies and melted butter, mixing until the texture resembles wet sand.
- Press the mixture firmly into the bottom of your prepared baking dish, creating an even layer.
- Chill the crust in the refrigerator for about 10 minutes while you prepare the filling.
- Making the Filling
- In a large mixing bowl, beat the cold heavy cream, powdered sugar, and vanilla extract until stiff peaks form (about 3-4 minutes). Set aside.
- In another bowl, beat the softened cream cheese and granulated sugar until smooth and creamy, about 2 minutes.
- Fold the whipped cream into the cream cheese mixture using a rubber spatula, being careful not to deflate the whipped cream.
- Gently fold in the rainbow sprinkles and crushed Oreo cookies until just combined. (Reserve a few tablespoons if you want to create visible layers.)
- Assembling the Cake
- Spread the creamy funfetti mixture over the chilled Oreo crust, smoothing the top with a spatula.
- Cover the dish tightly with plastic wrap.
- Refrigerate for at least 6 hours, but preferably overnight (this is crucial for the proper texture!).
- Serving
- When ready to serve, lift the cake from the pan using the parchment paper overhang.
- Decorate the top with additional whipped cream, rainbow sprinkles, and mini Oreo cookies.
- Slice with a sharp knife, cleaning the blade between cuts for neat slices.
Notes
- Cream cheese temperature is important – it should be softened but not melted for the smoothest texture
Use jimmies sprinkles rather than nonpareils (the tiny ball-shaped sprinkles) as they won't bleed colors as much
For cleaner slices, dip your knife in hot water and wipe dry between cuts
Make it ahead – this cake actually tastes better after it's had time to set up overnight
Step-by-Step Instructions
Preparing the Crust
- Line an 8×8-inch baking dish with parchment paper, leaving overhang on the sides for easy removal.
- In a medium bowl, combine the crushed Oreo cookies and melted butter, mixing until the texture resembles wet sand.
- Press the mixture firmly into the bottom of your prepared baking dish, creating an even layer.
Making the Filling
- In a large mixing bowl, beat the cold heavy cream, powdered sugar, and vanilla extract until stiff peaks form (about 3-4 minutes). Set aside.
- In another bowl, beat the softened cream cheese and granulated sugar until smooth and creamy, about 2 minutes.
- Gently fold in the rainbow sprinkles and crushed Oreo cookies until just combined. (Reserve a few tablespoons if you want to create visible layers.)
Assembling the Cake
- Spread the creamy funfetti mixture over the chilled Oreo crust, smoothing the top with a spatula.
- Refrigerate for at least 6 hours, but preferably overnight (this is crucial for the proper texture!).
Serving
- When ready to serve, lift the cake from the pan using the parchment paper overhang.
- Slice with a sharp knife, cleaning the blade between cuts for neat slices.
Pro Tips for Perfect Icebox Cake
- Cream cheese temperature is important – it should be softened but not melted for the smoothest texture
- For cleaner slices, dip your knife in hot water and wipe dry between cuts
- Make it ahead – this cake actually tastes better after it’s had time to set up overnight
Variations to Try
- Chocolate lover’s version: Add 2 tablespoons of cocoa powder to the filling
- Birthday cake: Use Golden Oreos instead of regular Oreos for the crust
- Seasonal themes: Use colored sprinkles to match holidays or special occasions
Storage Instructions
- Refrigerator: Store covered for up to 5 days
- Freezer: Can be frozen for up to 2 months (thaw overnight in refrigerator before serving)
Recipe FAQs
Can I use a different size pan?
Yes! Use a 9-inch round springform pan for a round cake presentation, or a 9×9-inch pan (reduce servings to 9 larger pieces).
Can I make this without cream cheese?
For a lighter version, substitute mascarpone cheese, or use 8 oz cream cheese and increase the whipped cream to 3 cups.
If your sprinkles are bleeding, they may be nonpareils rather than jimmies. Add sprinkles just before assembling, and handle minimally after adding them.
Can I add other mix-ins?
Absolutely! Try white chocolate chips, crushed cookie pieces, or even chopped candy bars in place of some of the sprinkles.
Prep Time: 15 minutes | Chill Time: 6 hours (or overnight) | Total Time: 6 hours 15 minutes
Servings: 9 slices
Calories: 380 kcal per slice
